How I ended up making my WordPress blog serverless? Part 1
Recently in my team, we did prove of concept to re-architecture our application on AWS which was using AWS AppSync as a backend engine and React frontend on S3 which made service serverless. This is a common AWS architecture pattern. I wanted to make my personal WordPress site serverless too.
Why? Price
My personal blog was receiving about 5 unique visitors per month meanwhile hosting it cost $7 per month because I’d cheapest EC2 instance always running with attached EBS.
I was paying for the idle server.
Going serverless handles your application scaling both uses cases: scaling up and down. For example, S3 allows only static content hosting but it’s charged per storage and per requests. Using this service considering my website current load, the total price for month hosting would be under $0.50. However if one day, my blog would receive millions of page views, it would scale without a need for me to lift a finger.
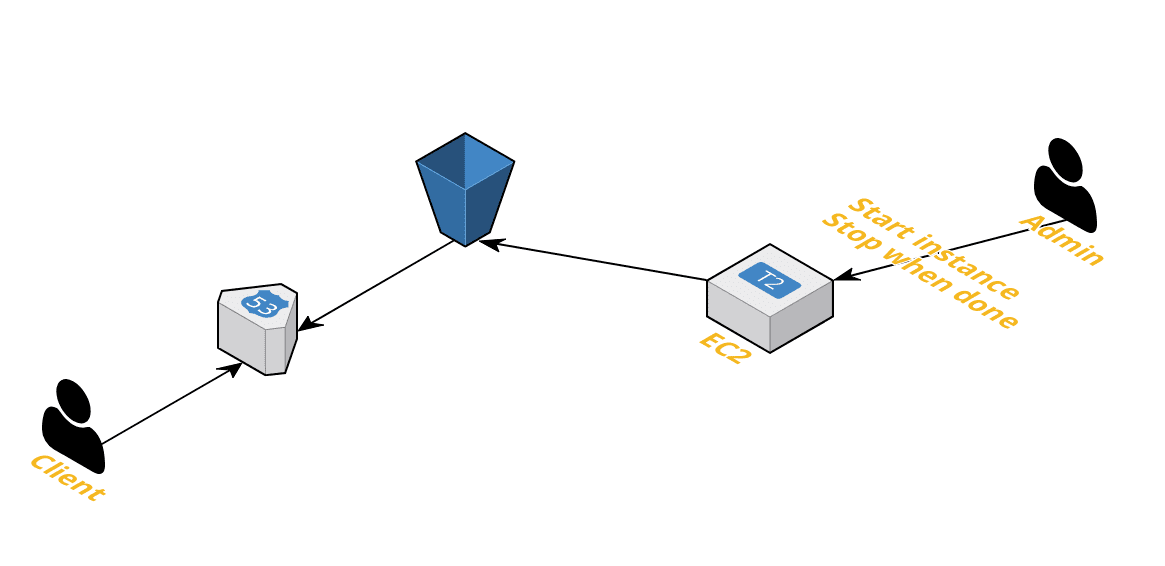
Attack plan {#2519}
Create an ephemeral server (container) with attached external storage. This will serve you as a dynamic website to modify content and you can create static files from it. When you got static files, upload them to S3 from where your users can access it.
Price {#2e4c}
As long as you keep your EC2 container stopped you don’t need to pay for it but your data will be stored on external SSD/HDD disk which needs to be paid for which is 0.25$ per month for 10GB HDD (https://aws.amazon.com/ebs/pricing/)
Keep in mind that your EC2 and S3 be in the same region to avoid data transfer fees.
Transfers between S3 buckets or from S3 to any service(s) within the same region are free — https://aws.amazon.com/s3/pricing/#Data_Transfer_Pricing
Let’s do it {#4e4b}
These’re steps to solve the problem
- (Optional) Remove dynamic content/replace with API endpoints
- Make page static
- Create S3 bucket
- Sync static files to S3 bucket
- (Optional) Migrate your domain by adding Hosted Zones
Let’s get hands dirty now
Step 1. Remove/replace dynamic content (Optional)
Dynamic content is everything that gets compiled on the backend just before returning a website. In WordPress world, it’s PHP code used for example to search on your website or to add comments. All this needs to go away or be replaced with API endpoints to your service. For example, if from a static website we call API into a service, that will be alright. In short, PHP needs to go away but Javascript frontend code is welcome.
WordPress plugins exist to handle this but in my case, I removed comments and search button.
Step 2. Export static website
Once again, WordPress site is dynamic because everything gets generated on the fly when a user requests a page. We’ll need to request every single page and save a static version of it and replace hyperlinks to a static version of a page. This is a tremendous manual job. However, this is an old problem, therefore, many solutions exist known as saving the page offline.
I’ve installed WordPress plugin _Generate Static Website _where you press a button and after a few minutes, it generates a static version of your website.
Step 3. Create a S3 bucket with static website hosting and public access
a. Create bucket
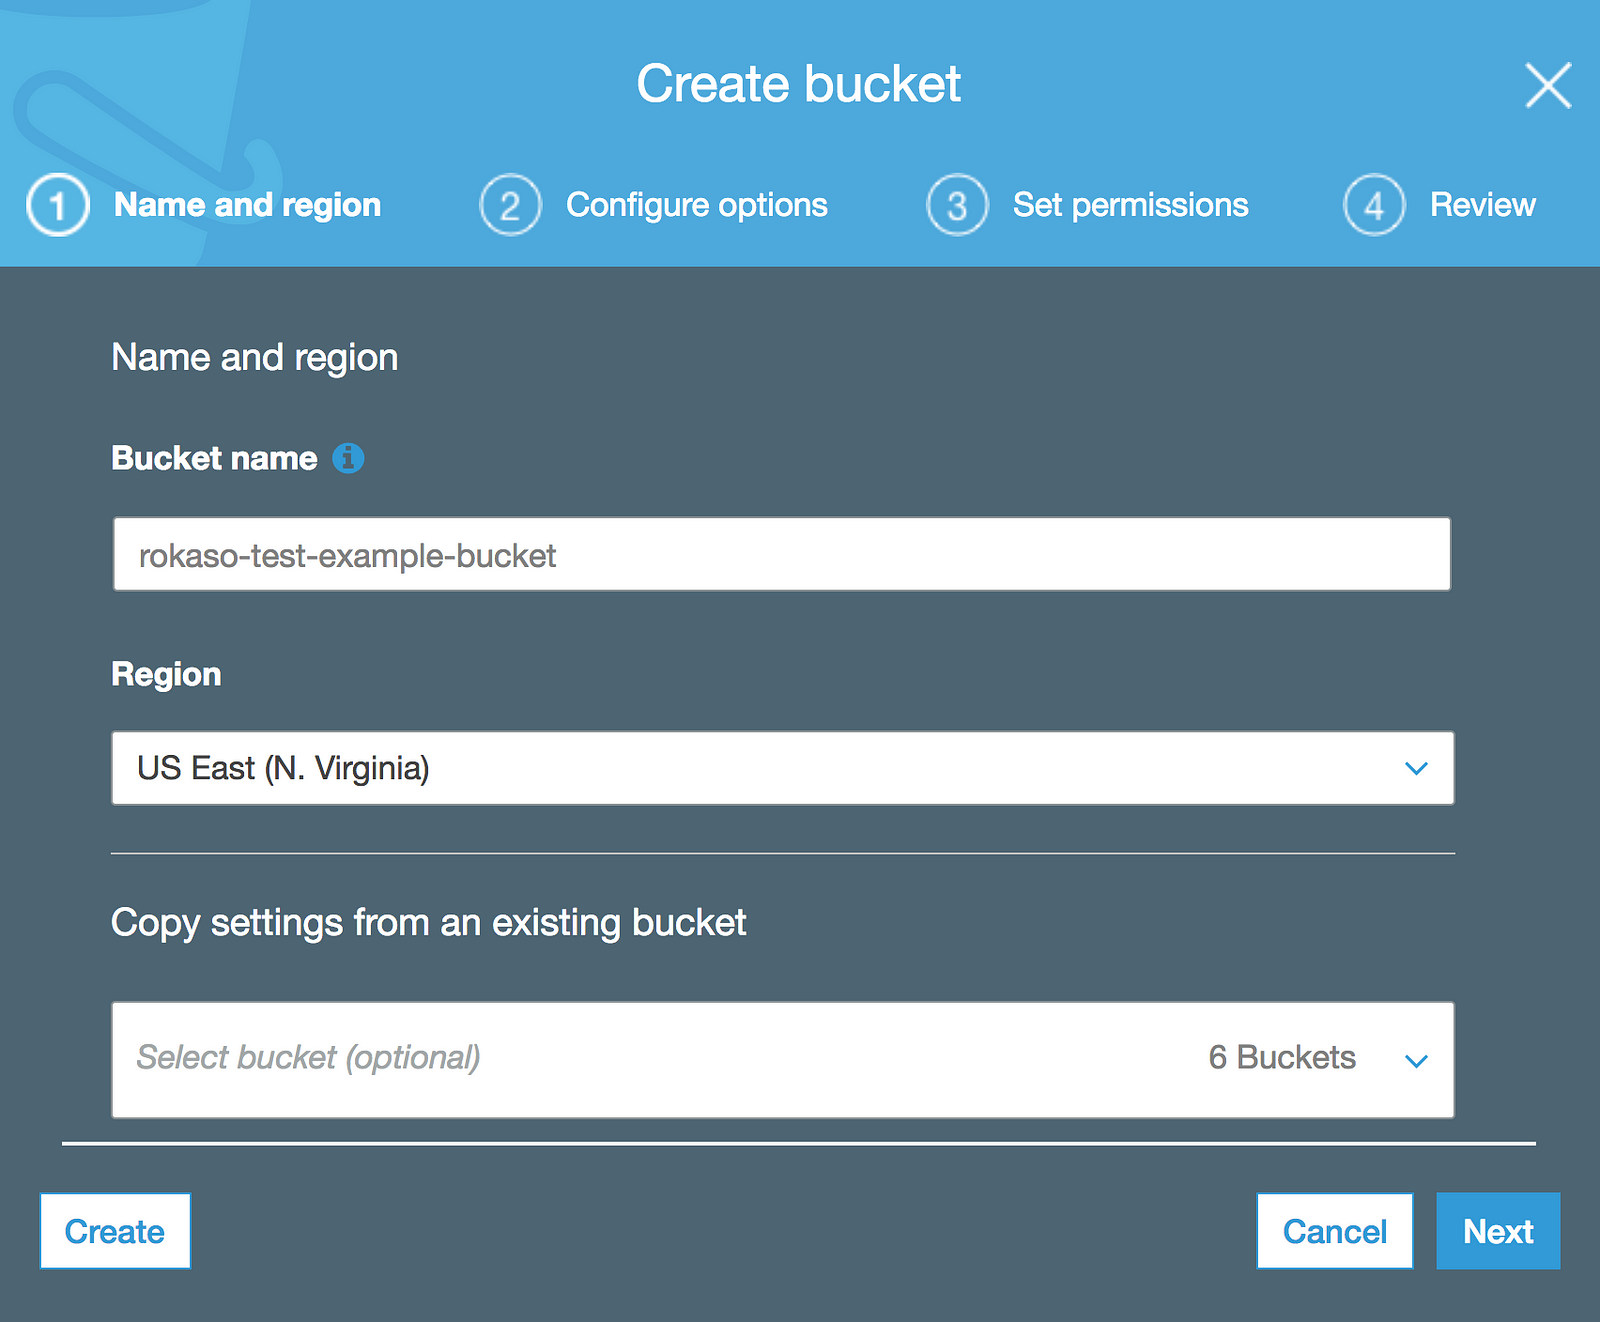
b. Make website static under bucket Properties select “Static website hosting”_and tick “_Use this bucket to host a website” _then enter _Index document and press Save
c. Add public access policy
To add public access policy, select S3 and your bucket.
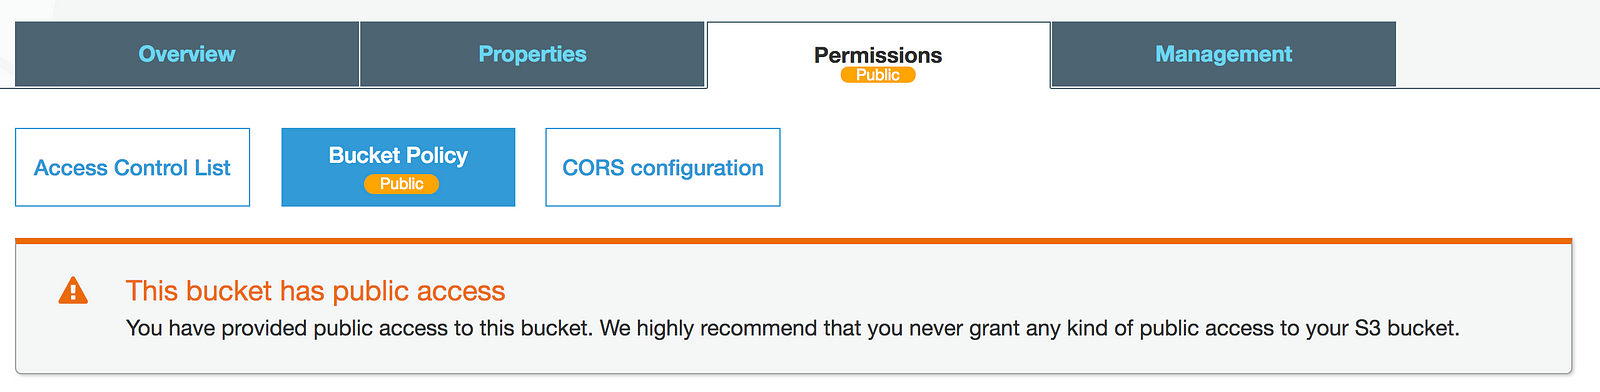
Paste this policy into the box.
{
    "Version": "2008-10-17",
    "Statement": [
        {
            "Effect": "Allow",
            "Principal": "*",
            "Action": "s3:GetObject",
            "Resource": "arn:aws:s3:::BUCKET_NAME/*"
        }
    ]
}
AWS will always show the alert that the bucket has public access. If you are sure that you’re going to put only public files, you can ignore the warning. More about it at:Why does AWS recommend against public S3 buckets?
_Yes, if you know what you’re doing ( edit: and everyone else with access to it does, too…), you can ignore this…_serverfault.com
Step 4. Upload to AWS S3 bucket
Login to your server and run
aws s3 sync /path/where/static/files/are s3://your-bucket-name
This requires that EC2 instance could access S3 bucket. You will need to attach IAM role to your EC2 instance to allow read and write to S3
If you’re not using Amazon Linux, you’ll need to install AWS CLI. More info at https://docs.aws.amazon.com/cli/latest/userguide/installing.html
Now you can access your website at S3 website endpoint.
Step 5. Transfer your domain (Optional)
Your website is already available at URL something similar like http://BUCKETNAME.s3-website-eu-west-1.amazonaws.com/
Not very glamorous. Huh?
Below is the step-by-step guide on how to use your domain to redirect from your domain https://docs.aws.amazon.com/AmazonS3/latest/dev/website-hosting-custom-domain-walkthrough.html
That’s it. When a user hits my website at www.rokaso.com it gets redirected to S3 bucket.
Further plans
Make the process more automated because or existing overhead to start the instance, press generate files button, sync to S3 and most importantly shut down EC2.